Wednesday, November 28, 2012

Diagnostic Tests Of Dental Pain


There are several simple tests that may assist in diagnosis of dental pain.

- Pulp Sensitivity Test:
This test can be done by using cold or hot stimuli.
Cold Stimulus is done by using Dry ice, or an ordinary ice stick that is placed in the cervical region of the tooth to detect posibility of pulpal inflammation.
Hot Stimulus is done by heating an instrument and placing it to one of the tooth surfaces.
In both of them, if pain occured and faded away once removing the stimulus indicating healthy tooth, if pain occured and persisted for a few minutes indicating inflammed pulp that must be treated endodontically and if the pain didnt occure indicating a necrotic pulp.

- Percussion Test:
Using an instrument handle, the tooth is tapped in the longitudinal axis. A painful response suggests possible periapical inflammation. (ex: Apical Periodontitis)

- Probing:
Placing a fine, blunt probe (Periodontal Probe) gently into the gingival sulcus surrounding the tooth to check the health of the gingival tissues. Bleeding and/or sulcus depths greater than 3-4 mm indicate a periodontal disease and a pocket which then should be diagnosed to have periodontal treatment.

- Mobility Test:
Holding a tooth firmly on the buccal and lingual sides between a finger and a solid instrument enables mobility to be assessed.
All teeth have a small amount of mobility (<0.5 mm) (Normal Or Mild Movement),
The teeth with movement of (0.5-2 mm) should be splinted (Moderate Movement),
While the teeth with (Severe Movement) of (2-4 mm) should be treated surgically or to be extracted.

- Palpation:
Careful digital palpation around the area of concern may reveal tenderness and the type and extent of swelling. (Usefull in cases of Tumor or Abscess or Soft Tissue Abnormalities)

- Radiographic Examination:
Sometimes we need a radiographic X-ray to detect some underlying abnormalities and possible pain sources.
We use periapical radiographes to check 3 neighboring teeth together and it's usefull to detect the extent of caries, reccurent caries, periapical lesions, crown root ratio and fructures.
We use orthopantomograph (OPG) to check the upper and lower full teeth set and neighboring important structures for abnormalities and possible causes of pain and it's very usefull in cases of impacted teeth, relation between upper teeth and maxillary sinus and presence of oral lesions in bone.

-----------------------------

This Article has been Authored by :: World Of Dentistry :: TEAM
For any suggestions please don't be hesitate to feedback us

:: World Of Dentistry :: TEAM

Thursday, November 15, 2012

Oral Herpes Simplex


Etiology:
Herpes virus hominis, Most commoly type I virus, but approximately 10% are thought to be caused by Type II.

Clinical Forms:
- Oral Herpes Simplex occurs in three clinical forms:
1- Recurrent small blisters on the lips commonly referred to as fever blisters or secondary herpes labialis. (most common form).
2- Generalized oral infection called primary herpetic stomatitis.
3- Small ulcers usually localized on palatal mucosa. (least common form).

Treatment:
- Antiviral drugs such as Acyclovir, Famciclovir, Penciclovir, Valacyclovir and over-the-counter Abreva have all shown that they can decrease the time of disease as well as help with pain management.
- Treatments that suppress the immune system abnormalities may improve more severe lesions and lessen pain.

Prognosis:
- Primary infection usually resolves in 10-14 days. Once the virus has entered the body, it travels through nerve trunks to the nearest ganglion where it may lie dormant for the remainder of the patient’s life.
- The Recurrence occured by “reawakening” of the virus, not reinfection from the outside.
Patients should drink liquids to prevent dehydration, should take a broad-spectrum antibiotic to control secondary bacterial infection, but does not shorten the viral infection. Antiviral drugs may shorten the duration of the disease if they are started early. (once the symptoms appear).
Clinicians should be aware that the herpes virus may cause disseminated infection including encephalitis in which case the prognosis is extremely grave.

Differential Diagnosis:
- Primary herpetic stomatitis may resemble oral lesions of erythema multiforme, but herpes can be diagnosed by exfoliative cytology.
- Lesions of herpangina and hand, foot and mouth disease, both caused by Coxsackievirus, may clinically resemble oral herpes virus infections.
- Recurrent intraoral herpes may be confused with herpes zoster.
- Aphthous Ulcer can be differentiated since it usually does not occur over bone, does not form vesicles and is not accompanied by fever or gingivitis.

-----------------------------------
-----------------------------------
-----------------------------------

If you have any sugesstions or other informations, please don't be hesitate to ask or feedback us
Thanks for reading

Yours,
:: World Of Dentistry :: TEAM

Dental Numbering Systems


 1- Universal Numbering System:


((Primary Teeth))

---Beginning with the upper right "E" designated by letter A -----> J
---Beginning with the left lower "E" molar designated by letter K---->T

((Permenant Teeth))

---Starting with upper right third molar, starts with number 16 -----> 1 , since (1) resembles upper left third molar.
---Starting with lower left third molar Teeth are numbered 17 ----> till 32

---------------------------- 

2- Palmer Natation System:


((Primary teeth))-Now used-
---For each quadrant, number teeth as (A, B, C, D, E)

((Permenant teeth))
---For each quadrant, Number teeth as (1, 2, 3, 4, 5, 6, 7, 8)

---------------------------- 

3- Federation International "Two digit system" (FDI)


In this system ...
-1st digit indicates quadrant, where (1--->4) refers to permenant jaws, While (5--->8) refers to primary jaws.

-2nd digit refers to the tooth number from (1--->8) in permenant teeth, and (1--->5) in primary teeth.

So as for the first digit:
1 ----> Refers to upper right quadrant
2 ----> upper left quadrant
3 ----> lower left quadrant
4 ----> lower right quadrant
5 ----> upper right quadrant(In Primary teeth)
6 ----> upper left quadrant(Primary)
7 ----> lower left quadrant(primary)
8 ----> lower right quadrant(primary)

----------------------------
----------------------------
----------------------------
Thanks All for reading
if you have any suggestions please feedback us

Authored By
::World Of Dentistry:: TEAM

Saturday, November 10, 2012

How To Use ProTaper Endodontic Files


ProTaper geometries:


The Endodontic ProTaper files have a unique features, including:

- Changing percentage tapers over the length of its cutting blades.
- The progressively tapered design replicates the Schilderian Envelope of Motion technique and serves to significantly improve flexibility, cutting efficiency, and safety.
- They are convex, triangular cross-section, which enhances the cutting action while decreasing the rotational friction between the blade of the file and dentin.
- They have a changing helical angle and pitch over their cutting blades, which reduces the potential of an instrument from inadvertently screwing into the canal.
- The noncutting, modified guiding tip. This feature allows each instrument to safely follow the secured portion of a canal, while the small flat on its tip enhances its ability to find its way through soft tissue and debris.
- The ProTaper system is comprised of three Shaping and five Finishing files

Types Of Protaper Endodontic Files:


There are two types of files for the ProTaper Endodontic Files;
"The Shaping Files" and "The Finishing Files" ...

The Shaping Files:

- Shaping Files are Two: File No. 1 & File No. 2, Termed S1 & S2, Purple and White Respectively.
- The Auxiliary Shaping File, termed SX, has no identification ring on its gold-colored handle and, with a shorter overall length of 19 mm.
- The S1 and S2 files have D0 diameters of 0.17 mm and 0.20 mm, respectively, and their D14 maximal flute diameters approach 1.20 mm.
- SX File, provides excellent access when space is restrictive. The SX file has a D0 diameter of 0.19 mm and a D14 diameter approaching 1.20 mm.
- The Shaping files have increasingly larger percentage tapering, allowing each instrument to engage, cut, prepare and shape the canal, performing its own 'crown down' work.
- SX File has a much quicker rate of taper between D1 and D9 as compared to the other ProTaper "S files", it is primarily used after the S1 and S2 files to more fully shape canals in "coronally broken down" or "anatomically shorter" teeth.

The Finishing files:

- There are five "Finishing files" named F1, F2, F3, F4, and F5 have yellow, red, blue, double black, and double yellow colores corresponding to D0 diameters and apical tapers of 20/07, 25/08, 30/09, 40/06, and 50/05, respectively.
- From D4–D14 each instrument has a decreasing percentage taper which serves to improve flexibility, reduce the potential for dangerous taper-lock, and reduce the potential to needlessly overenlarge the coronal two-thirds.

ProTaper shaping technique:


- First, one should know that: The potential to consistently shape canals and clean root canal systems is significantly enhanced when the coronal two-thirds of the canal is first pre-enlarged, followed by preparing its apical one-third.

Scout the coronal two-thirds:

- "Hand files" sizes 10 and 15 are measured and precurved to match the anticipated full length and curvature of the root canal.
- The 10 and 15 hand files may be utilized within any portion of the canal until they are loose and a smooth reproducible glide path is confirmed.
- The loose depth of the 15 file is measured and this length transferred to the ProTaper S1 and S2 files.

Shape the coronal two-thirds:

- The secured portion of the canal can be optimally pre-enlarged by first utilizing S1, then S2. Prior to initiating shaping procedures,
- The pulp chamber is filled with a full strength solution of NaOCl.
- Without pressure, the ProTaper Shaping files are inserted into the canal and follow the glide path freely and easily.
- For more optimize safety and efficiency, the Shaping files are used, like a brush, creating lateral space, which will make the Shaping file’s larger, stronger, and of more active cutting blades.
- N.B: this brush-cutting action can be used to:
Eliminate cervically positioned triangles of dentin,
More effectively shape into fins, isthmuses, and canal irregularities, and
To relocate the coronal aspect of a canal away from furcal danger.
- N.B: If any ProTaper File ceases inside the secure Portion of the canal, then withdraw it and know that the debris blocked the intrablade spaces making the walls push the file away and decrease the cutting effeciency.
- N.B: Upon removing each Shaping file, visualize where the debris is located along its cutting blades to better appreciate the region within the canal that is being prepared.
- Following the use of each Shaping file, irrigate, recapitulate with a 10 file to break up debris, and move it into solution, then re-irrigate.

Scout the apical one-third:

- The apical one-third of the canal is fully negotiated and enlarged to at least a size 15 hand file, Working length confirmed, then the patency file is established.
- NOW, A decision must be made between whether to finish the apical one-third with rotary or hand instruments.
- If, a new size 15 hand file glide easily inside the canal without any interupption, this means that the canal if of normal shape and having no irrigularities and anatomical morphologies, then the Rotary ProTaper will be very good, easy and successfull.
- While If, a size 10 or 15 hand files must be precurved and necessitate a reciprocating handle motion, then the Manual ProTaper File is the best and most successful choice.

Shape the apical one-third:

- Vigorous irrigation with NaOCl is very important now, to remove the debris that may decrease the effect of the shaping files (discussed befor in "Shape the coronal two-thirds" section), to avoid blockage of canals and facilitate the shaping proccess.
- The ProTaper sequence is to carry the S1, then the S2, to the full working length.
- Float, follow, and brush (discussed befor in "Shape the coronal two-thirds" section) until the terminus of the canal (Apical Foramen) is reached.
- S1, then S2, will typically move to length in one or more passes depending on the length, diameter, and curvature of the canal.
- Following each ProTaper file, irrigate, recapitulate with a size 10 file, then re-irrigate.
- After using the Shaping files, particularly in more curved canals, working length should be reconfirmed, as a more direct path to the apical foramen has been established, leading to decrease working length.
- The preparation can be finished using one or more of the ProTaper Finishing files in a non-brushing manner.
- The F1 is selected and passively allowed to move deeper into the canal, in one or more passes, until the terminus is reached.
- Apical flutes are inspected, and if they are loaded with dentin, then visual evidence supports, the shape is cut.
- After using the F1 file, Irrigate with NaOCl, recapitulate, confirm patency, then re-irrigate to liberate debris from the canal.

ProTaper finishing criteria:


- Following the use of the Protaper File F1, the ProTaper Finishing Criteria is to gauge the size of the foramen with a Manuale file 20 to determine if this instrument is snug or loose at length, If the 20 hand file is snug at length, then the canal is fully shaped and, if irrigation protocols have been followed, ready to pack.
- if the 20 hand file is loose at length, then gauge the size of the foramen with a 25 tapered hand file. If the 25 file is snug at length, then the canal is fully shaped and ready to pack.
- If the 25 file is short of length, proceed to the Protaper File F2 and, when necessary, the Protaper File F3, the Protaper File F4, and the Protaper File F5, gauging after each ProTaper Finisher with the same D0 correspondingly sized hand file.
- If the 50 hand file is loose at length, then use alternative NiTi rotary or manual files to finish the apical extent of these larger, easier, and more straightforward canals.

----------------------

To Download The Full Lecture Provided By :: World Of Dentistry :: TEAM, please follow one of the following servers:


This lecture is authored and copyrighted to :: World Of Dentistry ::

:: World Of Dentistry :: TEAM

Medications Used In Dentistry

Introduction to dental medications.

Dental Work as other medical fields , requiring application of therapeutics to treat, control, prevent, .... etc conditions.

Here, we are going to talk about different medications, drug classifications, doses, side effects, Interactions, brand names, ... etc.

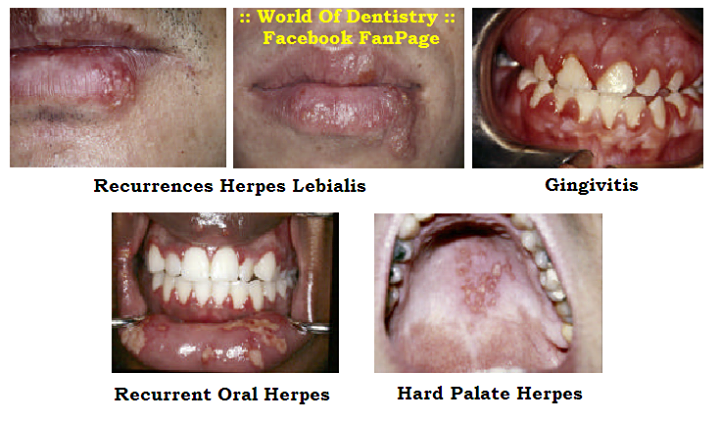
the dental field contains a lot of diseases, Syndromes, Conditions altering the treatment modality and requiring different drugs, so that there are a lot of drugs to the dentist that may prescribe, furthermore, there are a lot of drugs that the dentists should know as they cause conditions in oral cavity, leading to a diagnosis of medical condition in the patient Or even may have interactions with drugs you're welling to prescribe.

Drugs used in dentistry are a lot, simply, can be classified into:

• Medications used to control pain and anxiety
• Analgesics
• Antibiotics
• Anesthetics
• Medications used to treat dental infections
• Antifungals
• Other dental medications

----------------------------------

Chapter One: Medications used to control pain and anxiety

Dental treatment includes pain, In almost all the procedures ex: reduction, cavity preparation, surgery, sublingual scaling, … etc., then, the dentist should be care about this point, because, the dental Client (Patient) who comes to the dental office seeking treatment is almost nearly 90% afraids from what is called a dentist, then it becomes one of the most important success factors of the dentist in his work in the point of view of the patient is feeling comfortable in treatment without pain. AS one of the most reported Complication by clients is PAIN.

Dental Procedures is then accompanied with control of pain and sedation, with different procedures, including psychological control of pain, medication, anesthesia, sedation, Anxiety reduction protocol, and much more.

Here In this article we will discuss those drugs that include control of pain and anxiety, but NOW in this part of the article we will discuss the general view of the next chapters.

Several medications are available to help create more relaxed, comfortable dental visits. Some of the medications make the client feel no pain during the treatment, while the others can make him relax and others make him sleep completely.

----------------------------------

How can we choose the way to control pain and anxiety for the Client?

First of all, the dentist should discuss with the patient the procedures that will be done, the overall health of the client, history of allergies and your anxiety level befor any approach is to be chosen.

----------------------------------

Basics to follow when choosing drug for relieving pain.

Analgesics are the drugs that are used for relieving pain, the Minor dental procedures (Non-surgical) requires a little relieving drugs, so the Non-narcotic are the drugs of choice, while the more invasive surgical procedures including oral and maxillofacial surgeries requires the narcotic analgesics as it works in the CNS (will be discuss later in the Chapter Three).

Before the dental procedure is to take place, the dentist should decide to put the client in the status of “FREE OF PAIN” then the anesthesia should be taken in consideration. The Anesthesia is classified into local and general anesthesia, while most of dental procedures requires the local, then it be used in almost all the cases, but the general anesthesia will be used in Oral and Maxillofacial surgeries, in completely un-cooperative patients or for child patient where the cavity preparation is nearly impossible.

----------------------------------

What is the Anxiety and how it can be controlled?

Anxiety is a psychological and physiological state characterized by somatic, emotional, cognitive, and behavioral components.[2] It is the displeasing feeling of fear and concern. (Wikipedia)

Anxiety can be controlled by the anti-anxiety drugs, such as nitrous oxide, or by sedatives, tranquilizers, Or By Anxiety reduction Protocol And can be classified as:

1- Benzodiazepines
2- Sedatives – Hypnotics
3- Anti-histaminics

All act as Anti-anxiety, anti-convulsant, sedative-hypnotics and skeletal muscle relaxants.

1- Benzodiazepines are a lot: but what are used in dentistry are:

+Diazepam (Valium)
+Chordiazepoxide (Librium)
+Oxazepam (serax)
+Lorazepam (Ativan)
+Flurazepam (Dalman)

2- Sedatives and hypnotics are: Barbiturates and non-Barbiturates.

+Barbiturates are: Pentobarbital, secobarbital, phenobarbital, methohexital.

3- Anti-histaminics are: Benadryl, Phenergan, Atarax & Avil.

Anxiety Reduction Protocol (Most Commonly Used with Oral & Maxillofacial Surgeries):

- Before appointment

• Hypnotic agent to promote sleep on night before surgery (optional)
• Sedative agent to decrease anxiety on morning of surgery (optional)
• Morning appointment and schedule’s so the reception room time is minimized

- During appointment

• Non-pharmacological means of anxiety control
A- Frequent verbal reassurances
B- Distracting conversation
C- No surprises (Clinicians warns patients before doing anything that could cause anxiety)
D- No unnecessary noise
E- Surgical instruments out of patient’s sight
F- Relaxing background music

• Pharmacological means of anxiety control
A- Local anesthetics of sufficient intensity and duration
B- Nitrous oxide
C- Intravenous anxiolytics.

- After Surgery

• Succinct instructions for postoperative care
• patient information on expected postsurgical sequelae (e.g, swelling or minor oozing of blood)
• Further reassurance
• Effective analgesics
• Patient information on who can be contacted if any problem arise
• Telephone call to patient at home during evening after surgery to check whether any problems exist.

----------------------------------
----------------------------------
----------------------------------

Chapter Two: Analgesics

What are the Analgesics ... ?

The Analgesics are those drugs that elevate the pain threeshold above the subcortical level.
- Analgesics is a british word means painkilling.

What are the Classifications of analgesics:
Narcotics - Non-Narcotics.

----------------------------------

- Non-Narcotic Analgesics are:

A- NSAIDs
B- Anti-Pyretics

A- NSAIDs are :- analgesic, anti-pyretic, Anti-inflammation & Anti-Rheumatics

1- Aspirin( Acetyl Salicylic Acid) Works as Peripheral Vasodilatation and works on hypothalamus to decrease prostaglandin to decrease pain and inflammation.
2- Ibuprofen*
3- Zombirac*
4- Diflunisal* are: Derivative of salicylic Acid
5- Piroxicam*
6- Diclofinac*
* (( Such As NSAIDs in Properties ))

B- Anti-Pyretics is those drugs that acts as analgesics and Antipyretics such as ( Acetaminophen ) and it's an aspirin substitute.

----------------------------------

Narcotic Analgesics: Work on narcotic receptors on CNS.

- Morphine ia the drugs of choice in cases of: Post-operative pain, Accidental pain or traumatic pain.

Examples:

1- Methadone: Adult Dose 2.5-10 mg ( Not For Children under 18 years old )
2- Meperidine: Adult Dose 50-100 mg
3- HydroMorphine: Adult Dose 2 mg ( 8 times more potent than Morphine )
4- Codeine: Adult Dose 15-60 mg ( drug of choice used for cough suppression )

----------------------------------
----------------------------------
----------------------------------

Chapter Three: Antibiotics

1-Prophylactic antibiotics used before dental surgeries.
2-Commonly used antibiotics in dentistry.
3-Dental Concerns for uses of anti-infective agents

- Prophylactic Antibiotics Used Before Dental Surgeries-

* Only In the following conditions, Prophylactics antibiotics are recommended in order to avoid endocarditis

-- Prosthetic cardiac valves (High risk of endocarditis)
-- Surgically constructed pulmonary shunts (High Risk)
-- Previous Bacterial Endocarditis (High Risk)

-- Valvular Dysfunctions (Moderate Risk)
-- Hypertrophic Cardiomyopathy (Moderate Risk)
-- Mitral Valve Prolapse (Moderate Risk)

These Risks In these cases are in those dental procedures:

-- Dental Extractions.
-- Periodontal Surgeries.
-- Implant Procedures.
-- Re-implantaion Of avulsed teeth.
-- Endodontic instrumentation beyond the apex.
-- Subgingival Procedures.

----------------------------------
----------------------------------
----------------------------------


Other Chapters will be prepared and published soon, Keep in touch

Yours,
:: World Of Dentistry :: TEAM

Wednesday, November 7, 2012

Dental Caries


Index:

Part 1 = Introduction - Definition.
Part 2 = Classification Of Caries.
Part 3 = Factors Influencing Caries Etiology.
Part 4 = Histopathology Of Dental Caries.
Part 5 = Clinical Diagnosis Of Dental Caries.
Part 6 = Management of Deep Dental Caries.
Part 7 = Sequence of Dental Caries.

Introduction - Definition

What is Dental Caries:

It is a disease of microbial origin in which the dietary carbohydrates are fermented by the bacteria forming an acid which causes the demineralization of the inorganic part and disintegration of the organic part of the tooth.

--------------------------

Classification Of Caries:

A. According to number of surfaces involved:
1) simple (1 surface involved)
2) compound (2 surfaces involved)
3) complex (2 surfaces involved)

B. According to anatomic site:
1) occlusal (pit-and-fissure) caries
2) smooth-surface caries (proximal and cervical caries)
3) root caries

C. According to histology:
1) enamel caries
2) dentinal caries
3) cemental caries

D) According to severity:
1) incipient caries
2) occult caries
3) cavitation caries

E) According to onset:
1) primary (virgin) caries
2) secondary (recurrent) caries
3) residual caries

F) According to duration:
1) acute (rampant)
2) chronic

G) According to chronology:
1) early childhood caries
2) adolescent caries
3) senile caries

H) According to progression:
1) arrested caries
2) recurrent caries
3) radiation caries


 --------------------------

Factors Influencing Caries Etiology.

A)Host factors:

1) tooth factors:
a. Composition surface enamel due to dense
mineralization and high F-
content more resistant to caries than
subsurface layers of enamel.

b. Morphology more chances of caries if deep ,
narrow occlusal fissures or buccal or lingual pits present

2) saliva factors:
a. composition
a1) inorganic less chances of caries if higher Ca2+
and PO43- concentration
a2) organic less chances of caries with higher
ammonia and urea content

b. pH decrease in pH of saliva below 5.5 (ka critical
pH) predispose to caries.
The remarkable buffering-capacity of saliva (due to HCO3-H2CO3 and phosphate buffer systems) controls the marked fall in pH, thus preventing caries formation.

c. Position more chances of caries if malaligned , rotated teeth.

d. quantity decreased amount or absence ( xerostomia)
increases the risk of caries.

e. viscosity

f. antibacterial properties: due to the presence of lysozyme (cleaves the N-acetyl glucosamine and N-acetyl muramic acid components of bacterial cell wall) and salivary peroxidase system ( salivary peroxidase and thiocyanateSCN- components of saliva interferes with glycolytic pathway of bacteria)

3) systemic factors:
a) heredity
even though no strong evidence has been found connecting caries-susceptibility with heredity, studies have shown
“high DMF” father and “high DMF” mother produced offspring with a “high DMF” rate
And “low DMF” parents produced offspring with “low DMF” rates.
b) Pregnancy and lactation
despite the popular belief, there is NO evidence suggesting increase in caries in pregnancy (unless the mother has neglected her general oral health care).

-------------------------------

B) Diet factors
a. physical nature of diet
person taking food with more fibre-content less
susceptible to caries than those taking soft, refined
(worse if sticky) food

b. local factors

b1) carbohydrate content
though all forms of fermentable sugar leads to caries , there is always a higher risk of caries with free sucrose than starches.
Because sucrose in addition to its acid- byproduct produced during fermentation also aids in plaque development and adherence of cariogenous microbes to the tooth surface.
However starches due to large molecular structure, shows limited diffusion and hence can not directly enter the plaque .

b2) vitamin content
vitamins like (vit.D, vit.K and vit.B6) have been found to decrease the incidence of caries,
vit. B-complex deficiency has shown decrease in the rate of caries
whereas even though it is well-established that vit C-deficiency causes severe periodonta land pulpal changes , no evidence of decrease in caries by Vit C-supplement has been reported.
however a more extensive study to confirm the link between vitamins and caries is still desireable.
b3) fluorine content
even though there is reduced incidence of caries with F-in drinking water, there is no significant caries reduction with dietary fluoride (because of its metabolic unavailabilty).

C) Cariogenic potential of the microorganism

Available data strongly suggest an active involvement of Streptococcus mutans in caries initiation (especially in pit and fissure caries, and smooth-surface caries; and to some extent the root surface caries)
On the other hand, oral actinomyces like
Actinomyces viscosus, and
Actinomyces neslundii, have a more important role in root surface caries.
Also A. neslundii, Lactobacillus spp. And other filamentous rods have been implicated in dep dentinal caries.


 --------------------------

Histopathology Of Dental Caries


Enamel is composed of tightly packed hydroxyapatite crystals, which are organized in long columnar rods (enamel rods), but during caries progression certain histological changes are seen in enamel .
The following 4 histological zones of an enamel lesion clearly explains the development of enamel caries

zone 1 translucent zone
zone 2 dark zone
zone 3 body zone
zone 4 surface zone

-------------

Zone 1 translucent zone
Deepest zone representing the advancing front of enamel caries.
In this zone , pores or voids form along the enamel prism(rod) boundaries (due to easy H+ ion penetration)
It appears structureless when perfused with quinolone solution (having refractive index comparable to that of enamel) and seen with polarized light (hence translucent)

Zone 2 dark zone
Next deepest zone
Presence of many tiny pores block light transmission. These smaller air or vapor-filled pores make the regiion opaque.
Loss fo crystalline structure suggesting the process of demineralization and remineralization in this zone.

Zone 3 body zone
In demineralization phase, it is the largest portion of the lesion.
(whereas in remineralization phase, zone2dark zone is the largest portion which increases in the expense of the “body zone”)
Largest pores seen (pore volume 5 to 25%)
Presence of bacteria if pores large enough to permit their entry
Striae of Retzius well marked
(striae of Retzius is the primary point of entry of carious lesion into rodprism cores of enamel)

Zone 4 surface zone
Relatively unaffected by caries (only partial demineralization)
Because surface of enamel is relatively immune to caries (due to hypermineralization- because of saliva contact , and
higher surface F-content)
Also pore volume is lower than the body of lesion.

--------------

After the involving the enamel, the carious lesion progresses to the dentinal structure.
Caries advancement in dentin proceeds through 3 stages:

1) demineralization of dentin (by weak organic acids)
2) degeneration and
dissolution of organic material of dentin , mainly collagen
fibers (type I)
3) bacterial invasion after the loss of structural integrity caused
due to 1) and 2).

During the development of dentinal caries, clinically 5 different zones of progression can be seen (ac to Sturdevant )
zone 1 normal dentin
zone 2 subtransparent dentin
zone 3 transparent dentin
zone 4 turbid dentin
zone 5 infected dentin

--------------

Histologically , 5 zones of early dentinal caries progression can be seen (listed pulpally to occlusally)
zone 1 zone of fatty degeneration of Tomes’ fibers
zone 2 zone of dentinal sclerosis
zone 3 zone of decalcification of dentin
zone 4 zone of microbial invasion
zone 5 zone of decomposed dentin

Zone 1 zone of fatty degeneration of Tomes’ fibers
the most advancing front of dentinal caries characterized by the presence of a layer of fat globules ; hence stains red with the stain, sudan red.
significance

1) fat layer leads to impermiability of the dentinal tubules (DT) – trying to prevent further invasion of  carious lesion
2) favors sclerosis of dentin in zone 2.

Zone 2 zone of dentinal sclerosis
layer of sclerotic dentin which appears white in transmitted light
calcification of DT as a rxn of vital pulp and vital dentin to carious invasion , so as to prevent further penetration of microorganisms.
formation of this zone is minimal in rapidly progressing caries, and prominent in slow caries.

Zone 3 zone of decalcification of dentin
this zone lies above the zone of sclerotic dentin
initial decalcification of only the walls of the DT
presence of PIONEER BACTERIA- first of the microorganisms penetrating DT before there is any clinical evidence of caries.
bacteria present in individual DT are in pure form (i.e. either completely cocci or completely bacilli; not in mixed form)

Zone 4 zone of microbial invasion
in a layer above zone 3.
characterized by the presence of microorganisms in early stage of caries- acidogenic microorganisms in deeper layer- proteolytic microorganisms replace acidogenic bacteria supports the hypothesis that initiation (by acidogenic bacteria) and progression ( by proteolytic microorganisms ) are 2 distinct processes in caries development.

During initiation phase- in the early stage when caries is not deep , acidogenic bacteria predominant which utilizes carbohydrate for their metabolism
Later in progression phase – as the caries goes deeper , less and less of carbohydrate substrate available , hence acidogenic bacteria are replaced by proteolytic microorganisms which uses dentinal protein for their metabolism.

Zone 5 zone of decomposed dentin
Most superficial zone of early dentinal caries.
no recognizable structure in decomposed dentin

collagen and minerals seem to be absent
great number bacteria dispersed in this decomposed granular matter.

 --------------------------

Clinical Diagnosis Of Dental Caries


By one or all of the following:
1) Visual changes in tooth surface texture or color
2) Tactile sensation with judicious use of explorer
3) Radiographs
4) Transillumination
Aided by the knowledge of the probability of overall caries risk and patterns of susceptibility.

-------------------

A) Diagnosis of Pit and Fissure Caries:

Any one or more of the following:
1) Softening at the base of pit and fissure
2) Opacity surrounding the pit or fissure, indicating demineralization of enamel
3) Brown-gray discoloration radiating peripherally from the pit or fissure
4) Softened enamel that may be flaked away by explorer radiolucency beneath the occlusal enamel surface

B) Diagnosis of Proximal Surface Caries:

1) Visual – white chalky appearance or shadow under the marginal ridge
2) Tactile- probing with explorer on proximal surface may detect cavitation, which is defined as the break in the surface contour of enamel
3) Radiographic diagnosis- made with bitewing radiographs which show radiolucency beneath the enamel surface in the proximal area (should not be confused with cervical burnout!)

Arrested Lesions on Proximal Surface:
1) Appears as brown spots
2) On probing, surface is intact and hard
3) Radiograph shows decreased radiographic density in the affected region
4) Usually seen in old patients

Proximal Surface in Anterior Teeth:
1) Transillumination- in which light source directed through the tooth from the lingual side. Proximal surface caries, other than incipient caries, appear as a dark area along the marginal ridge
2) Tactile- exploration to detect any cavitation
3) Radiographs – may detect any small incipient lesion as well.

C) Diagnosis of Smooth Surface caries on the Facial and Lingual surfaces (Usually Gingival)

Initial phase :
1) CHALKY-WHITE, OPAQUE AREAS (“WHITE SPOTS”) over the smooth surface of the tooth, that is visually different from adjacent translucent enamel , which is revealed only when the tooth surface is clean and dry and disappears partially or totally when the tooth is wet . This initial phase of caries in enamel is k/a “incipient caries”.
The tooth at this stage appears to have lost its translucency because of extensive subsurface porosity due to demineralization.
2) Undetectable tectilely since surface is hard , intact and smooth.

Advanced Phase:
1) White to dark brown discoloration
2) Demineralized and softness to penetration

Arrested Lesion:
1) Dark, discolored areas mostly due to extrinsic staining
2) Hardening of lesion (due to remineralization)
3) Sclerotic or eburnated dentin

D) Diagnosis of Root Surface Caries:

1) Look for the following features at CEJ or more apically on cementum
early stage-
a) Well-defined discoloration adjacent to gingival margin,
typically near the CEJ
b) Softened cemental tissue compared with adjacent structure
advanced stage- softening on exploration
and cavitation.

2) Usually in older individuals , or in patients who has undergone perio- surgery , with the following predisposing factors
a) Cemental exposure
b) Dietary changes
c) Systemic diseases
d) Medications that affect amount and character of saliva.


 --------------------------

 Management of Deep Dental Caries


A) Chemical Measures For Caries Control:
Use of:

1) Substances which alter the tooth surface or tooth structure


a) Fluoride Exposure Application
Fluoridation of water supply ( with 1 ppm of F-)
Topical application of fluoride

i) Self-application
- Low dosehigh frequency rinses
(0.05% NaF daily)
- High potencylow frequency rinses
(0.2% NaF weekly)
- Fluoridated Dentifrices Toothpastes
(twice daily)
ii) Professional Application
- acidulated phosphate fluoride gel (APF gel)
(1.23% annually or semi-annually)
- NaF solution (2%)
- stannous fluoride (8%)

b) Bis-biguanides ( like chlorhexidine , alexidine)

c) Silver Nitrate

d) Zinc Chloride and Pottasium Ferrocyanide Solution

----------

2) Substances Which Interfere With Carbohydrate Degradation Through Enzymatic Alteration:

a) Vitamin K – Use of Synthetic Vit K (2-methyl-1,4-naphtoquinone)
b) Sarcoside - Na Lauroyl Sarcosinate,
Na Palmitoyl Sarcosinate,
Na Dehydro Acetate

----------

3) Substabces Which Interfere With Bacteria Growth And Metabolism:

a) Urea and Ammonium Compounds
b) Chlorophyll
c) Penicillin
d) Other antibiotics ( erythromycin, kanamycin, spiromycin, tetracycline, tyrothricin, vancomycin)
e) Caries vaccine
f) Nitrofurans – furacin, furadroxyl

B) Mechanical Measures For Caries Control:

1) Dental Prophylaxis (routine scaling and polishing)
2) Toothbrushing
3) Mouth Rinsing
4) Dental Floss
5) Oral Irrigators
6) Chewing Xylitol Gums (for 5 to 30 mints after meal)
7) Detergent Foods in Diet (hard, fibrous foods)
8) Pit and Fisure Sealants

C) Nutrietional Measures For Caries Control:

1) Diet Counselling
2) Restriction of Soft, Sticky Refined Carbohydrate Intake
3) Limiting in Between Meals.
--------------------------------

Sequence of Dental Caries

The Dental Caries can cause DEATH !!!

- First of all, We should know that the caries is the most common infectious disease for the humans.
- The Caries is a bacterial infection, which occurs briefly due to bacteria that ferment the carbohydrates to produce the Lactic acid which causes the demineralization of the enamel surfaces, causing the decay and cavities.
- The Caries may extend deeply into the tooth layers, to reach the dentin layer, which is sensitive, causing the tooth pain.
- Then the bacteria will penetrate the dentinal layers soon if neglected to reach the pulp chamber (or horns), causing the pulpitis, which will start as reversible OR irreversible.
- The Bacteria may drown deeply inside the pulp chamber to reach the orifices of the pulp causing pulp inflammation that would, if neglected, cause partial pulp necrosis that requires partial pulpectomy to manage.
- Then, the bacteria drown inside more deeply that will necrose the rest of the pulp canals causing complete pulp necrosis, then the patient will feel no pain.
- In this stage, the tooth is most commonly ( Badly Decayed ) and black in color, the patient may no seek dental help because he/she suffers of no pain, this neglection will cause the next serious step, which is the periapical abscess.
- The Periapical Abscess may be acute, because of the sudden increase of the pathogens strength or sudden decrease of the host immunity, causing pain specially during biting and percussion.
- And the periapical abscess may become chronic soon or after, if the immunity increased or the pathogens strength decreased, to wall of the infection.
- The chronic abscess may exacerbate to transform the chronic abscess into acute painful one again that leads the patient to seek dental help.
- The infection may then spread to the facial spaces, lower molars may spread infection to the submandibular and sublingual spaces, while the anterior teeth may spread this infection to the submental space.
- The neglected infection may spread to the spaces causing facial cellulitis and subsequent Ludwig's angina that may be fatal.

So, Caries may Lead to DEATH !!!

This Article Has Been Authored By :: World Of Dentistry :: TEAM

Tuesday, November 6, 2012

Fissure Sealants


- Those materials are used to prevent occlusal pit and fissure caries by filling the deep pits and fissures, and this is very conservative way of tackling of problem of occlusal caries

- Fluoride, systemically, has an effect on reduction of smooth surface caries but it has less effect on occlusal caries.

- Sealants can reduce the overall cariogenic challenge to teeth.

- Few dentists don't recommend using pits and fissure sealants at all, their motto here is that they fear the procedure would induce caries later on because of the preparatory steps , and giving a chance for later caries development.

Note: The earlier the fissure sealing procedure, the better the results.

- Types:
1- Resins
2- GIC
3- Compomers
4- Flouride containing sealants

The choice between resin/composite and glass ionomer Fissure Sealant should be based on adequacy of moisture control.

- Requirement Of Fissure Sealants:
1- Good adhesion to enamel for a long period.
2- Biocompatible.
3- Simple in application and easy in manpulation.
4- High flow capacity to enter narrow pits & fissures
5- Have proper setting and working time
6- Have very low solubility in the oral fluids.
7- Not causing miecroleakage at the enamel sealant interfaces.
8- It not necessary to fill the entire depth of pit & fissures but it should fill and seal the entire length.

- Indications of Fissure Sealant:
1- Newly erupted un maatured teeth with narrow deep pit& fissure
2- Patient with high susceptibility to caries
3- Patient with history of high caries in his primary teeth
4- The presence of incipent caries
5- PRR or normal restoration

- Contraindication of Fissure Sealant:
1- Patients who are not susceptible to caries
2- Tooth with Large occlusal restoration.
3- Presence of open occlusal restoration or carious on an other surface of the same tooth
4- Patient's behavior which may not permit adequate dry field throughout procedures
5- Matured carious free teeth present in oral cavity for more than four years with wide shallow pits & fissures

- Steps of application of Fissure Sealant:
1- Use Rubber Dam or Cotton Roll and Suction, to isolate the tooth.
2- Clean the tooth very well using a non-fluoridated prophylactic paste and low Rubber Cup.
3- Dry the tooth very well.
4- Acid etch the tooth very well by the use of 30%-50% phosphoric acid or citric acid, for 60 seconds for permanent teeth, and 90 seconds for primary teeth.
5- Wash by water and dry by air very well.
6- Fissure sealant is then applied to the propely etched pit and fissure using its brush or applicator.
7- Make sure that the material is filling the etched pits & fissures.
8- Cure the material if it is light cure, OR, Leave it if it's chemically cured.
9- Check for retention and high spots, by asking the patient to bite or by using articulating papper.
10- Apply fluoride gel on the teeth surfaces to remeneralize the demenralized areas wich may not be covered by the fissure sealant.
11- Ask your patient to avoid rinsing or drinking for 30 secounds.

---------------------------

This Article is authored by :: World Of Dentistry :: TEAM
For more informations and questions please don't be hesitate to ask back.
for support, you'll be most welcomed.

Yours,
:: World Of Dentistry :: TEAM